
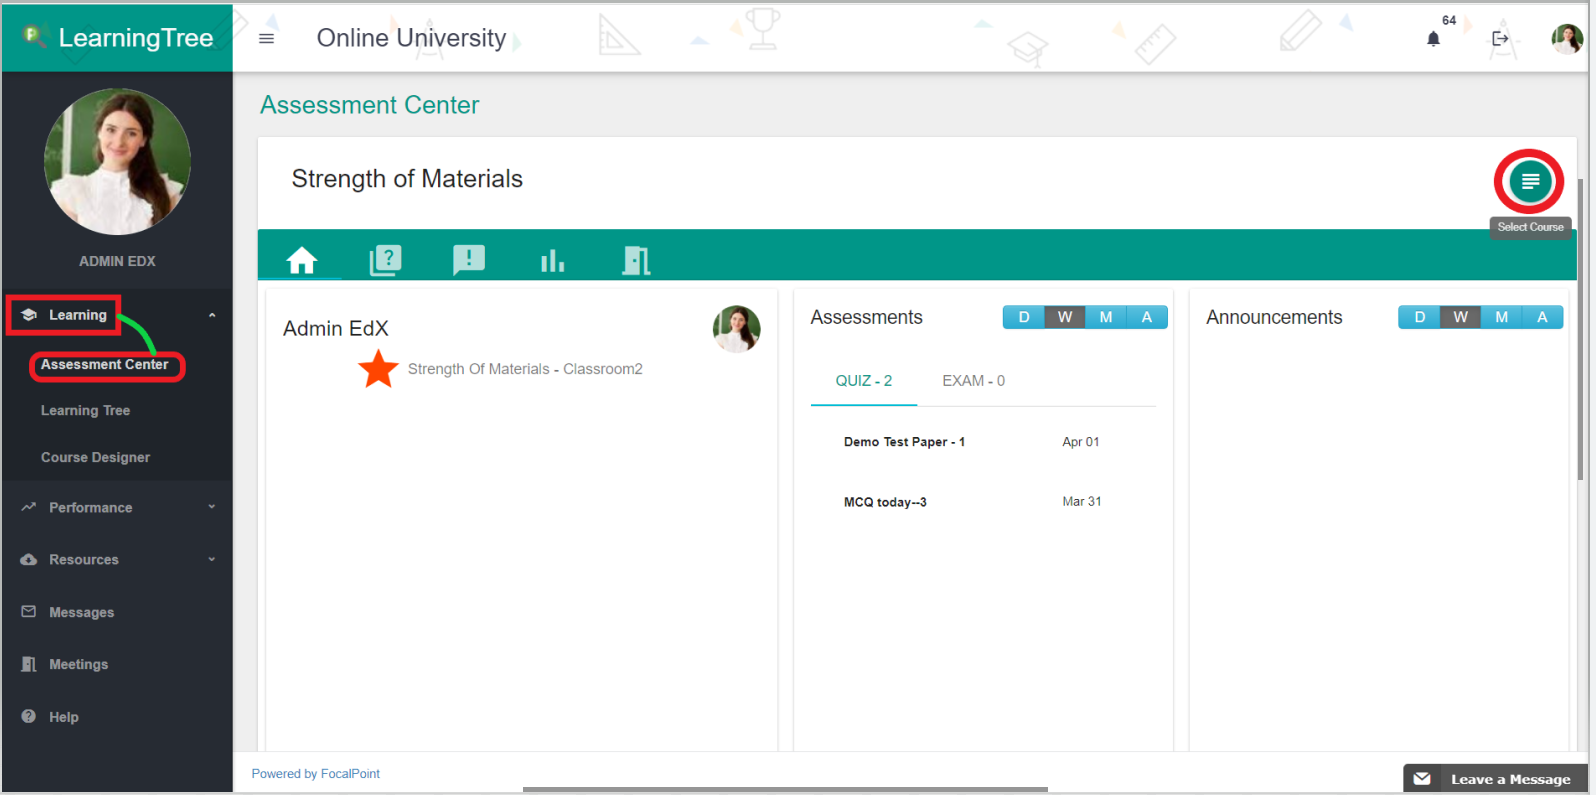
- Select the "Assessment Center" of the Learning Tab on the left side of the page.
- Select the courses tab located on the right side of the page. Use the drop-down tab to select the course/class you wish to assign the assessment.
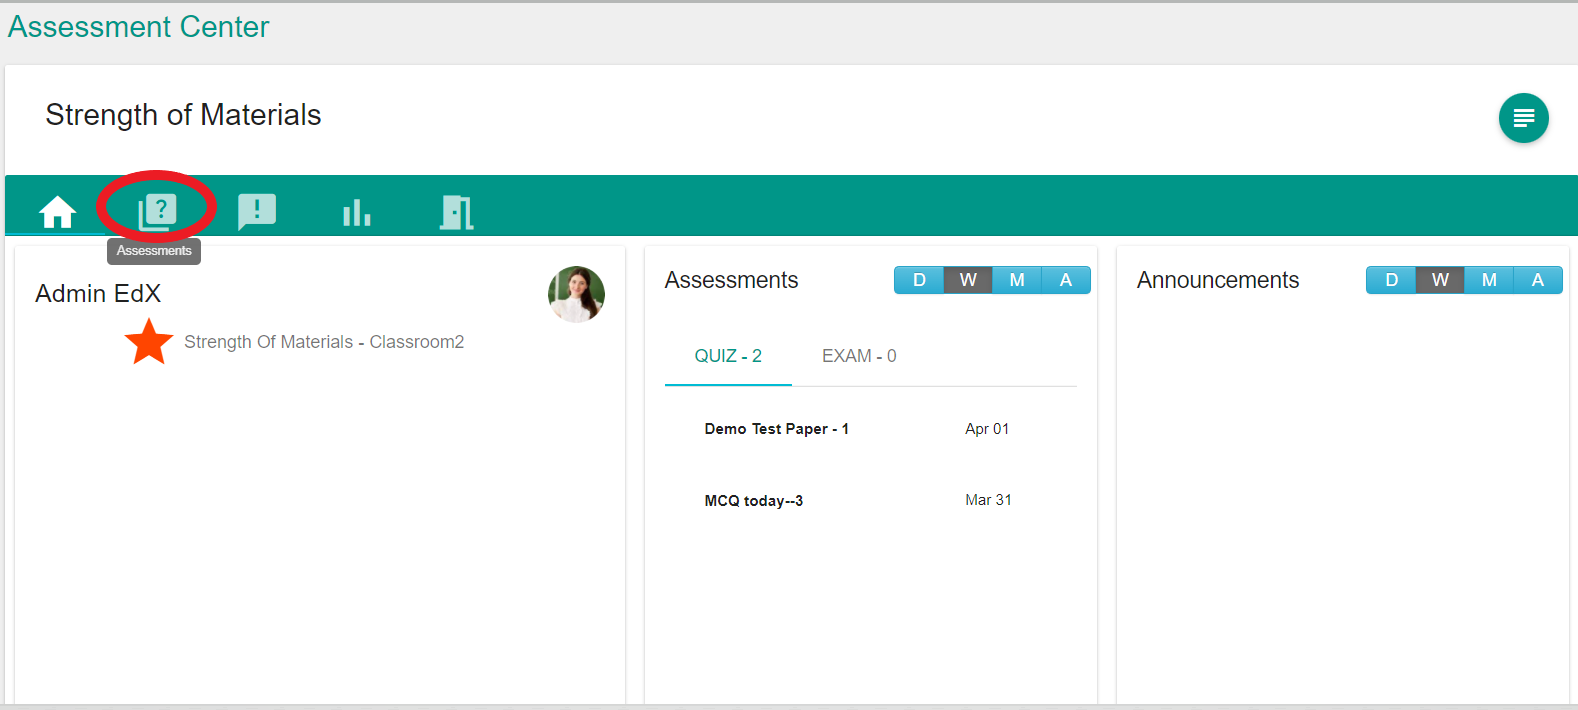
- Then click on the 'Assessments' tab.
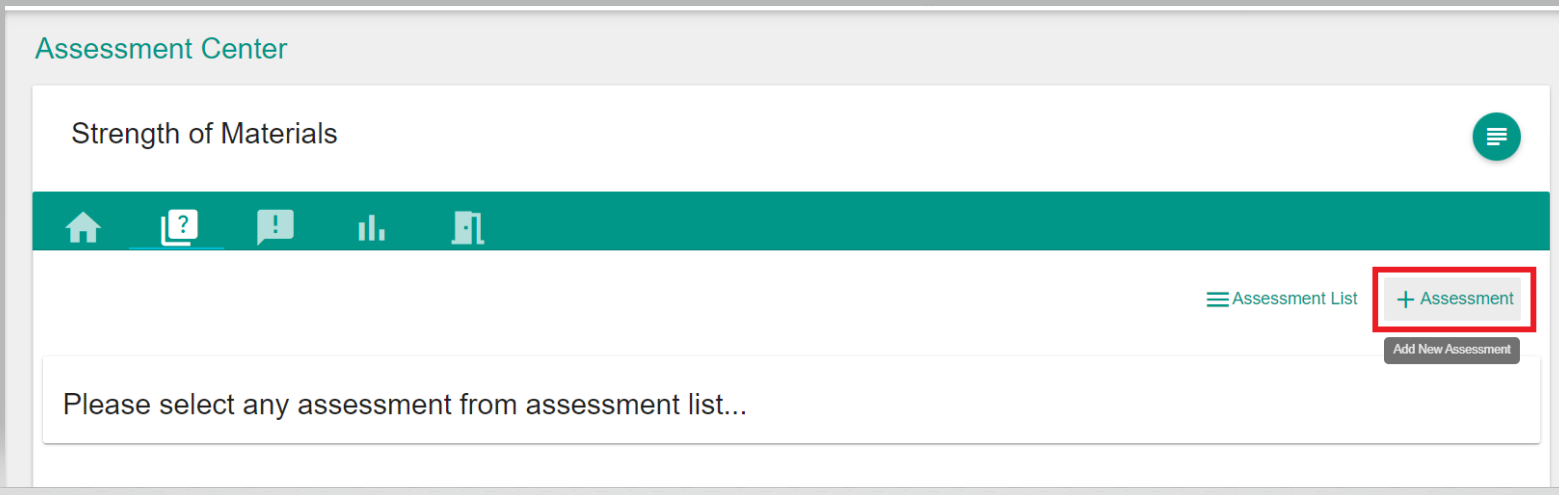
- Since you are creating a new assessment, click on the ‘+Assessment’ Tab located at the top right-hand side of the page.
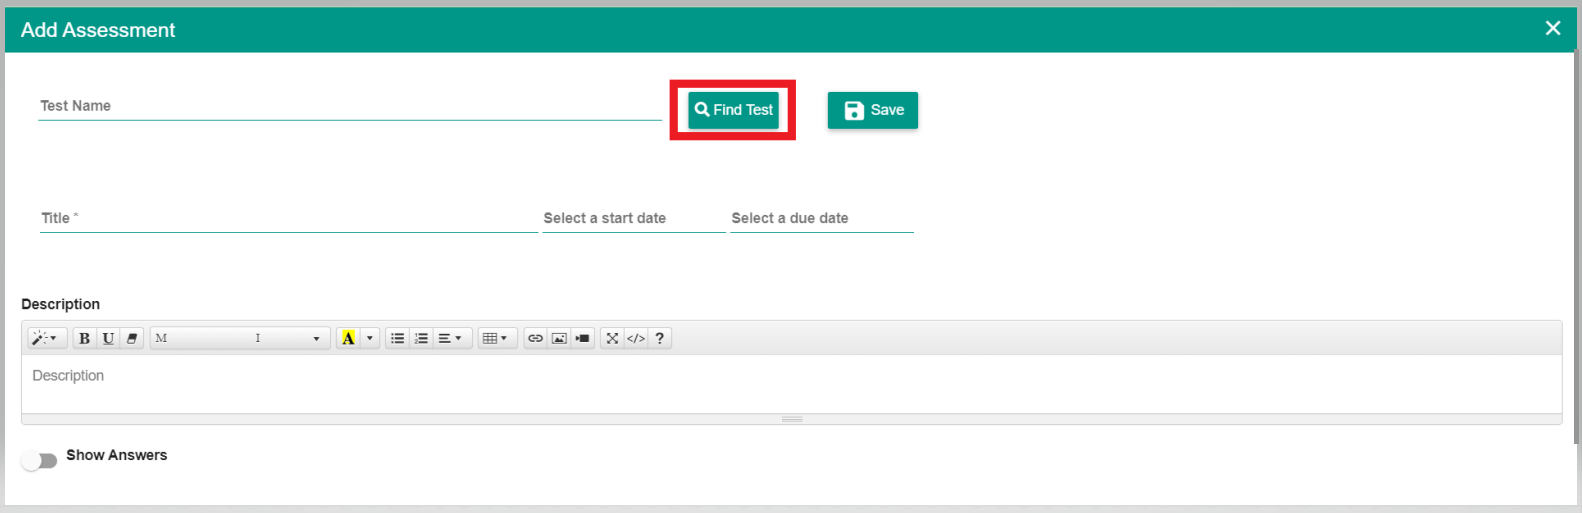
- Provide the title, start date, due date, and a description/comment using the noted fields. The name and description/comments filled out will be visible for students to see in the virtual classroom. You can always edit this information at any time so if you need to adjust the start and due date of the assessment you can easily do so.
Note: The ‘Due Date’ you select will determine the filter under which your test will appear under ‘Activities’ once created. Using the same ‘Start Date’ and ‘Due Date’ will result in you seeing your new test under the ‘Today’ filter only.
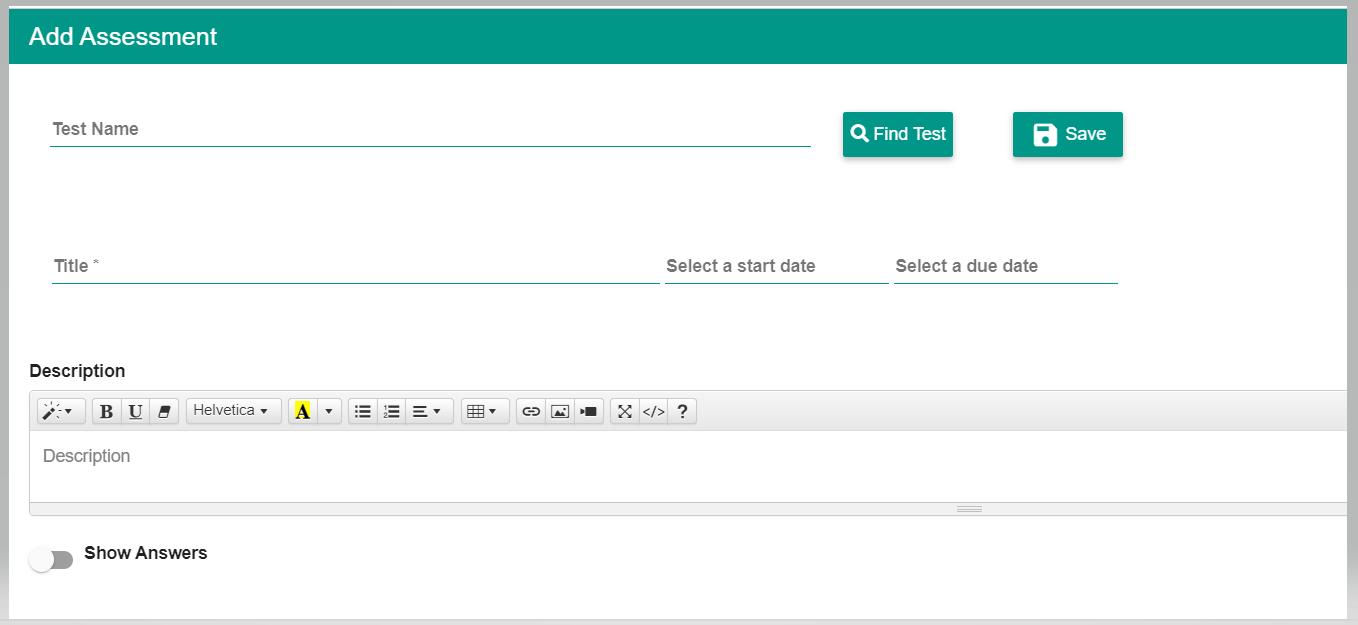
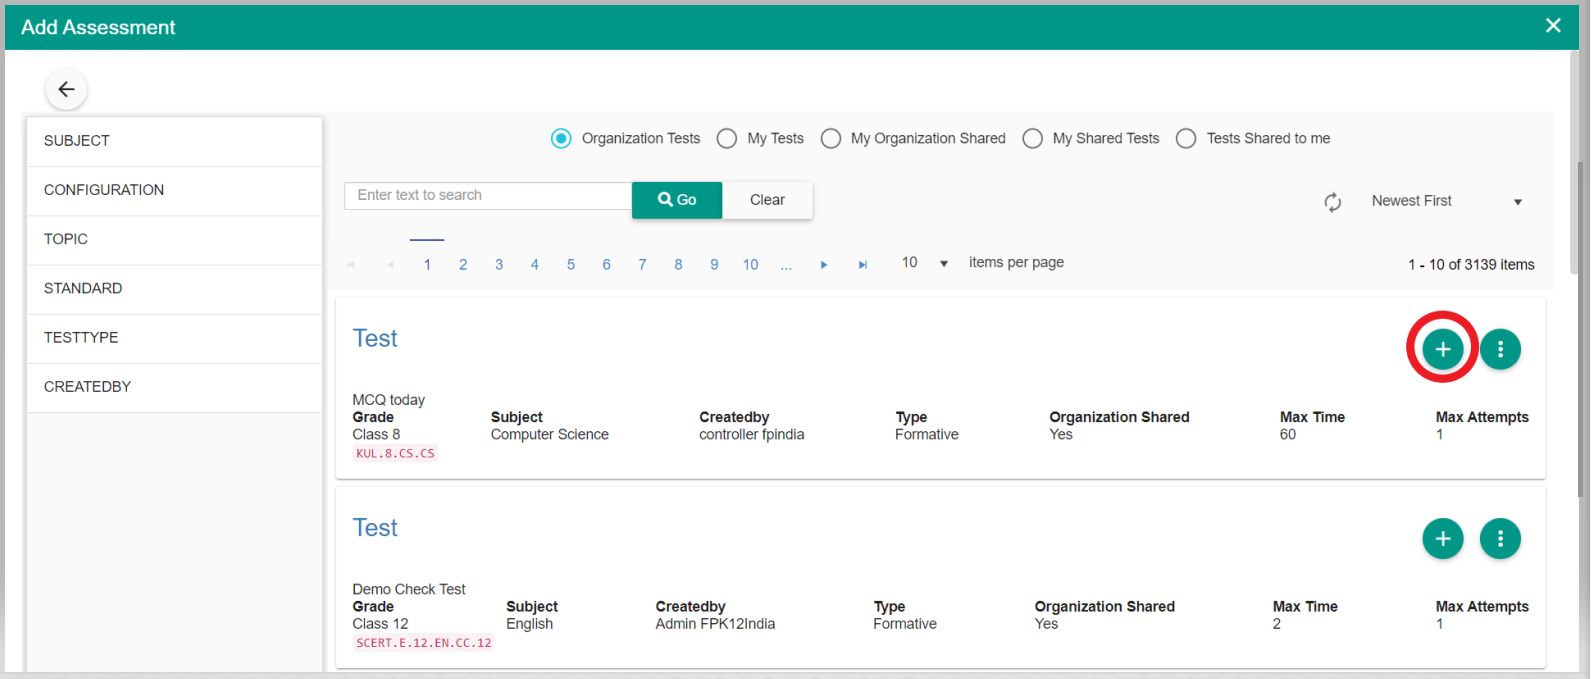
- After completing this information, you will now need to find the test and add it to the course. To do so, select the ‘Find Test’ Tab. Locate the assessment you wish to assign by typing the name of the assessment into the search bar. Or, you can also find the test by simply clicking the ‘Find Test’ tab and then sorting from newest to oldest. You can find other tests by sorting oldest to newest, A-Z or Z-A order.
- After finding your test, select the ‘+’ icon on the right side of the test and the test will then be assigned.
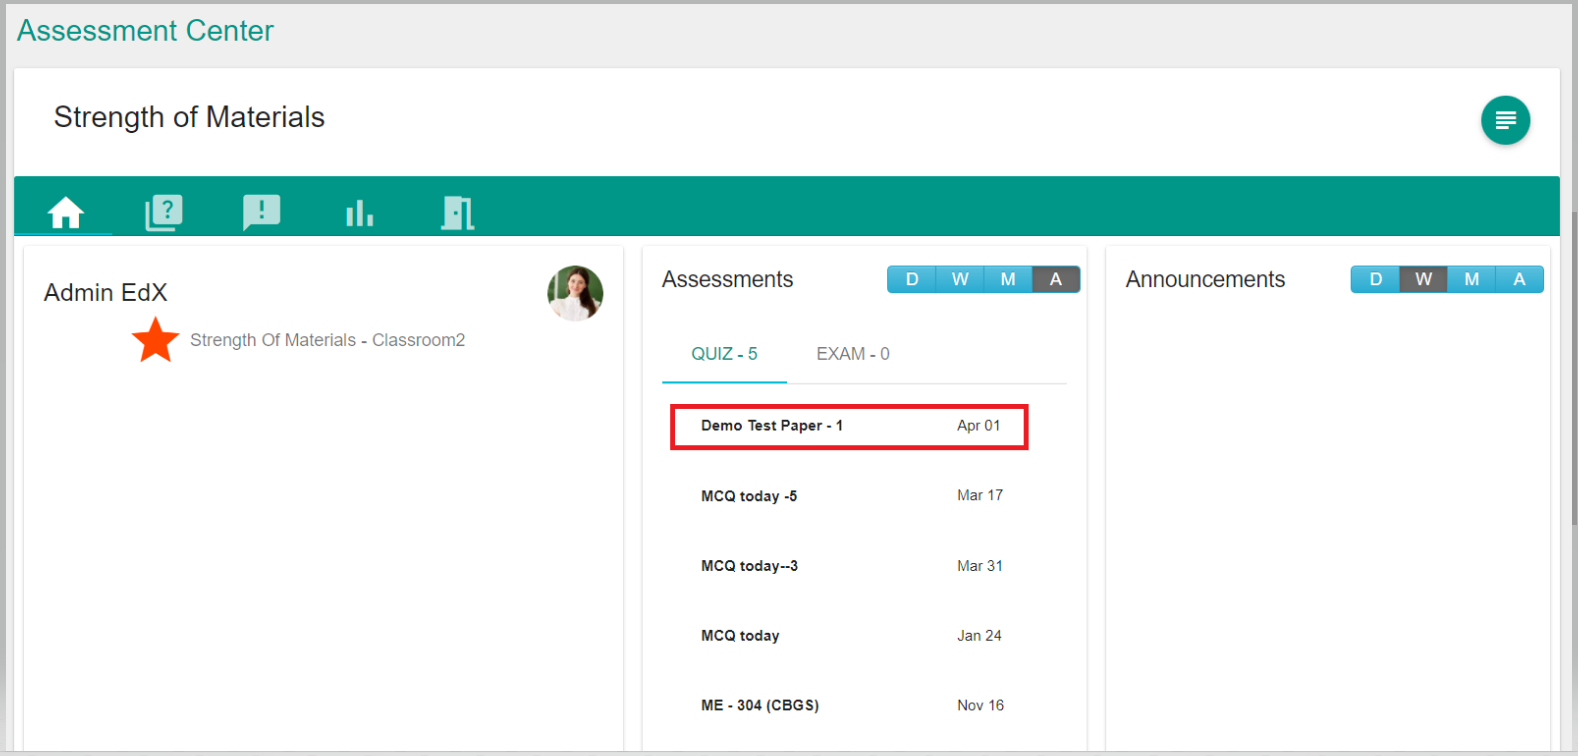
- You will then receive a pop-up notification confirming that your test has been created successfully. You will now see the assessment available in the course under both the ‘Activities’ Tab and in the ‘Summary’.
Note: Whether you will see your test under the ‘Today’, ‘This Week’, or ‘This Month’ filter will be determined by the ‘Due Date’ you indicated in Test Details.
Comments
0 comments
Please sign in to leave a comment.